Pages
Monday, July 12, 2010
Monday, July 5, 2010
Fishing on the Fourth
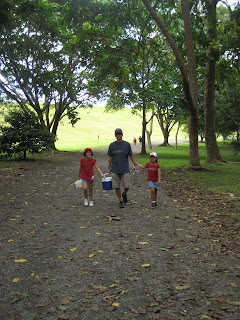
On a beautiful sunny 4th of July, we headed out to Hoomaluhia Botanical Gardens in Kaneohe for some fishing. The girls had been asking to go fishing for quite some time. Equipped with their rods and reels, bread for the fish, snacks and drinks for themselves, hats, shoes and sunscreen they were ready to catch some fish!
With the help of Knud Lindgard, a writer for Hawaii Fishing News who volunteers at Hoomaluhia and helps kids (and parents) catch fish, we were able to increase our catching from 3 fish in an hour to "too many to count" in the remaining time we were there. As long as the bread stayed on the hook, it was almost a guaranteed catch. And the fact that the fish are a terrific "Tangerine Tango" color made it even more fun! ("Tangerine Tango", one of Stampin' Up!'s new Core Colors!) *smile*
It was a great day for fishin' and a great family day. I'm sure we'll be heading out to Hoomaluhia again soon.
Thanks for letting me share this day...
Stampin' Smile,
j
Thursday, July 1, 2010
Tea for Two...
Hello! Happy July!
In a previous post I shared a Tea Bag Box that MaryAnn showed us. Diane (Hi Diane!) asked for the directions, so I thought I'd share them here too. So if any of you would like to make this Tea Bag Box, here you go! :)
Box Cover
1. Score 4-3/4” x 5-1/4” card stock or DSP at 1” on all sides. Use bone folder to crease well. Cut along solid lines as shown in Diagram A. Cutting a slight “V” shape will alleviate “bulk” when assembling box cover. (Diagram not to scale) Use Sticky Strip to assemble box cover.
Diagram A
Box Bottom
2. Score 6” x 12” cardstock at 2-5/8”, 5-3/4”, 8-3/8” and 11-1/2” along 12” edge. Score at 2” along one 6” edge. Use bone folder to crease well. Cut along solid lines as shown in Diagram B. “V”s shown in diagram are a little wide. They don’t have to be that wide.
Diagram B
3. Using Paper Cutter or Hobby Blade cut out rectangle from “second to the last panel” as shown in Diagram C. Rectangle is 1/4” from bottom edge and 1/4” from each of the side creases and 1” high. Use 3/4” circle punch to cut out semi circle.
Diagram C
4. Assemble box with Sticky Strip. First adhere sides together then close the bottom flaps to complete box. Save “front” bottom panel for last. “Front” panel is the one with the cut out hole. This just gives the box a nice finish.
5. Fill with individually wrapped tea bags. Cover box. Add ribbon and embellishments as desired.
The sample uses:
119257 Marina Mist 1/8” Taffeta Ribbon 5.95
120060 Itty Bitty Bits 8.95
100908 Chocolate Chip Classic Stampin’ Pad 5.95
118763 Mini Vintage Tags 4.95
117167 Greenhouse Gala Designer Series Paper 9.95
If you have any questions and/or would like to order any of the supplies to make this project, please let me know...or you can order directly from my Stampin' Up website.
Thanks, Mary Ann!
Stampin' Smiles!
jane
Summer Celebration at Craft Project Central!
Summer officially arrived on June 21st, but at Craft Project Central,
we're starting a special Summer Celebration, beginning today!
During the month of July, subscribe to any two months and receive a third month of your choice, FREE! And I know some of you are going to ask, if you purchase four months, can you get two months FREE? And the answer is yes!
To take advantage of this sale, simply subscribe during the month of July to two months and then email us at contactus@craftprojectcentral.com with the month that you would like free! And don't forget, when you take advantage of this special offer, you'll also be getting the bonus projects for each of these months! That's 33 wonderful projects for $20!
We've got great projects planned for the rest of the summer and into the holidays so we hope you'll join us and take advantage of this special Summer Celebration Sale!!
Stampin' Smiles!
jane and the ladies at Craft Project Central
Subscribe to:
Posts (Atom)


